Alright, let’s get straight to the point—if you’re here, chances are you’ve got a new LED controller from our line, a set of car LEDs that’s been sitting in your garage, and that little voice in your head going, “Wait, how do I actually wire this to my ride without blowing a fuse or frying my new lights?” I’ve talked to hundreds of fellow car guys and gals over the years, and that voice is super common. Most people think it’s rocket science, but really? It’s just following a few smart, safe steps—especially when you’ve got a controller made for cars, not some random off-the-shelf model. Let’s break this down like we’re chatting in a parts store parking lot, no boring jargon, just real talk. LED Controller
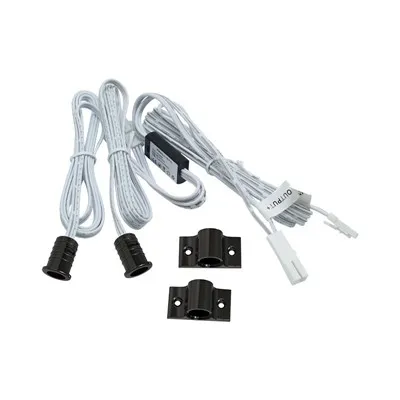
First things first: before you touch a single wire, stop. I’ve seen way too many people skip this step and end up with a dead battery, or worse, a smoking fuse box. Here’s the non-negotiable pre-work: disconnect your car’s negative battery terminal. Yep, that’s the black cable on the battery, usually marked with a minus sign. Why? Because even if your car’s off, there’s still a tiny trickle of electricity running through the system, and one wrong move with a wire could short it out. Grab a wrench, loosen the nut, and set the cable somewhere it can’t touch the battery post—tuck it next to the engine bay wall or something, so you don’t accidentally bump it later. While you’re at it, dig out your controller’s manual. Wait, our controllers? We print super simple, sticker-free manuals with clear diagrams, not tiny text that needs a magnifying glass. If you lost yours, no stress—hit us up, we can shoot you a digital copy in 2 minutes flat.
Next up, figure out where you’re mounting the LED controller. This is a make-or-break step most folks sleep on. You don’t want it somewhere that’s damp, like right above the wheel well, or where it’ll get bashed by loose debris on the road. I recommend a dry, out-of-the-way spot—like inside the center console, under the dashboard, or in a empty panel behind the glove box. If you’re mounting it near the firewall (the metal wall between the engine and cabin), just make sure any wires running through don’t rub against sharp metal edges—we include little rubber grommets with every controller kit for that exact reason, so use ’em. Pro tip: if you’re installing under-hood LEDs, get a controller rated for under-hood use (we have those too, waterproofed to handle rain and road spray) and mount it away from hot parts like the exhaust manifold or radiator.
Now, let’s talk about the actual wiring, and this is where our controllers shine—we color-code every single wire, no guessing. Let’s go over the basics, since that’s all you’ll need for 99% of setups. First, there’s the power wire: usually red, right? This is the main wire that gets power from your car’s electrical system. Wait—hold on, don’t just yank it straight to the battery. You want to run it through a fuse, guys. I don’t care if the controller says it has an internal fuse—adding an extra fuse in-line is cheap insurance, and way easier to replace if something goes wrong. The fuse rating? Check your controller’s specs—ours are usually 10A for most under-dash kits, 15A for under-hood. Get an in-line fuse holder from any auto parts store, strip the ends of the red power wire, crimp one end of the fuse holder to it, run the other end to a switched power source. Switched power means it only turns on when your car is on, not when the key is in accessory or off—this saves your battery from dying overnight. Where do you find switched power? Easy: use a test light (like the cheap ones with the clip and pointed end you touch to wires). Turn your key to the “on” position (not the start position), touch the test light to a wire, and if it lights up only when the key’s on, that’s your switched power. Common spots are the radio wiring harness, the interior light circuit, or the cigarette lighter (as long as it’s not always hot). Never run the red power wire straight to the battery’s positive terminal unless you absolutely have to—this is for hardwired setups like under-hood work, and even then, use a heavy-gauge wire (14 gauge minimum) and a 20A fuse max.
Then there’s the ground wire, almost always black. This is just as important as the power wire—bad ground is why most LED lights flicker or don’t work at all. Where do you ground it? You need a bare metal spot, not a plastic trim piece or a painted bolt. Look for a bolt on the car’s frame, or a metal bracket under the dash that’s connected straight to the chassis. Unscrew the bolt a little, scrape off any paint or rust under the head of the ground wire’s connector with a knife (or the edge of your key, works in a pinch), place the ground ring terminal under the bolt, and tighten it back up. If you skip scraping the paint, you’ll have a high-resistance ground, and your LEDs will be dim or flicker—trust me, I’ve fixed this mistake so many times, it’s not even funny. For under-hood setups, ground it to the engine block or a frame rail, same rule: bare metal, tight connection.
Now, what about the other wires? If you’re using a basic single-color LED strip, you’ll just have power, ground, and sometimes a dimmer wire. If you’re using an RGB (color-changing) kit, you’ll have red, green, blue, and maybe a white wire. Our RGB controllers are super straightforward—each color wire matches the corresponding wire on your LED strip. Just match them up (red to red, green to green, etc.), and that’s it. No mixing, no cross-wiring, it won’t cause anything to blow if you get it wrong, but it’ll just be the wrong color, so take 30 seconds to double-check.
Wait, a common question: can I wire this to my existing car lights, like my headlights or taillights? If you want your LEDs to sync with your turn signals or brake lights, yeah, you can, but you have to tap into that circuit safely. That means cutting the wire, stripping the ends, and using a tap connector (or crimp butt connectors, for a more permanent job) to connect the controller’s input wire to the light’s wire. Again, use a test light to confirm which wire is the brake or turn signal wire—don’t tap into the wrong one, or you’ll get weird glitches like your turn signals flashing your dome light.
Once all the wires are connected (and double-checked!), go back and reattach the negative battery cable. Now, before you zip-tie all the wires out of sight, do a test run. Turn your key to the on position, fire up the controller (if it has a power button, hit that), and check all your LEDs. For RGB kits, cycle through the colors to make sure each one works. If something’s not working, don’t panic—9 times out of 10, it’s a loose connection, or you mixed up the power and ground wires. Go back and check each connection, make sure no wires are touching each other (that’s a short circuit, which will blow a fuse), and double-check your fuse. If the fuse is blown, that’s a sign something’s wrong—unplug the controller, replace the fuse, and try again before you test anything else.
Now, for the finishing touches: zip-tie all loose wires to the existing wiring harness in your car, so they don’t swing around and get caught on moving parts or hot engine parts. If you’re mounting the controller under the dash, make sure it’s not blocking any pedals or the steering column. For remote-controlled or app-enabled controllers (we have those too, perfect for changing colors with your phone), the little receiver module usually mounts somewhere hidden, just make sure it has a clear line of sight for the remote or Bluetooth signal—don’t tuck it inside a metal box, that’ll block the signal.
Quick safety recap, because I can’t stress this enough: never use wire gauges thinner than what our kits include—thin wires get hot and can melt, which is a fire hazard. Always use fuses, no exceptions. If you’re not comfortable working with car electricals at all, that’s fine—we partner with independent installers all over, and we can hook you up with a local one for a fair price, no markup from us. We stand behind every controller we sell, so if something goes wrong (even if you installed it), hit us up first, we’ll troubleshoot with you for free.
At the end of the day, connecting an LED controller to your car isn’t brain surgery. It’s just taking your time, being careful with electricity, and following the simple steps we lay out. You don’t need a fancy degree, just a few basic tools and the right controller from us (not that cheap one from Amazon that dies after 3 months). Once it’s done, you’ll get to enjoy those custom under-dash glow, under-hood accents, or whatever LED setup you’ve been dreaming of, and you’ll know you installed it right, no messy wiring jobs that cause problems later.
If you’ve got questions about your specific car model, or want to upgrade to an RGB, app-controlled, or under-hood rated controller, don’t hesitate to reach out—our team is made of car enthusiasts too, not sales robots, so we’ll talk through your setup with you, no pressure. We’re always here to help you get your project done right, no hidden fees or fine print.
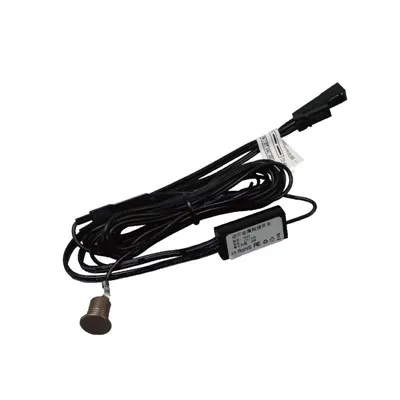
References:
- Automotive Wiring Basics: Safe Installation Practices for Aftermarket Accessories
- LED Controller Technical Specifications for Automotive Use
- SAE J1113: Electromagnetic Compatibility Measurement Procedure for Passenger Cars, Light Trucks, and Multifunctional Passenger Vehicles
Cabinet LED Driver Wait, hold on—one last thing: if you’re tapping into a high-current circuit (like brake lights, which pull a lot of power), make sure the controller’s output is rated to handle that. Our controllers are rated for up to 20A, which is more than enough for most LED setups, so you’re good. If you have a big, heavy-duty LED bar, we can get you a higher-capacity controller too, just ask. Yeah, that’s all—go wire that thing, and enjoy the glow.
Dongguan Lanbaoli Intelligent Technology Co., Ltd.
As one of the most professional led controller manufacturers and suppliers in China, we’re featured by quality products and low price. Welcome to buy advanced led controller for sale here from our factory. If you have any enquiry about quotation, please feel free to email us.
Address: 10th Floor, Building 32, Golden Town, No. 7 Technology Avenue, Houjie Town, Dongguan City, Guangdong Province
E-mail: anna@lampow.cn
WebSite: https://www.lblsensor.com/
